
Thank you for visiting my website!
Coding Environment Setup
For personal preference, I updated my terminal on my Macbook to iTerm2.
Installing homebrew saves a lot of time in the future for installing certain libraries and frameworks. Install instructions
In your terminal type:
/bin/bash -c "$(curl -fsSL https://raw.githubusercontent.com/Homebrew/install/HEAD/install.sh)"
In order to be able to follow my work in a terminal more clearly, I decided to setup "Oh My Zsh", which provides colour and line separation within the terminal
Install on terminal:
sh -c "$(curl -fsSL https://raw.githubusercontent.com/ohmyzsh/ohmyzsh/master/tools/install.sh)"
vim ~/.zshrc
ZSH_THEME=""
source ~/.zshrc
From the article listed previously in the Versus section, I had chosen to download Sublime Text as it had the easiest read layout for me personally. To download, go to the Sublime website.
FYI: “Sublime Text may be downloaded and evaluated for free, however a license must be purchased for continued use. There is currently no enforced time limit for the evaluation.”
Under Sublime Text editor there are packages you can add to make your coding experience better. In the tabs below, I have listed the ones I use, this does not mean you have to use these or limit yourself to just these.
This one is the first one that should be installed because it allows you to install/update packages seamlessly. On a Macbook all you have to do to install it is hit “cmd - shift - p” this will have a drop down menu pop up. Select install package control.
The website for package control has all the packages you can use and it has a description of each one.
I wanted to have a terminal in my code editor, so I found “Terminus”. Like before hit "cmd - shift - p” and from the drop down menu select “Package Control: Install Package” then type “Terminus”. Once you select it, it will install.
Now to set it up to pop-up you have to edit some code. As the picture shown below, go to “Preference → Package Settings → Terminus → Key Bindings”.

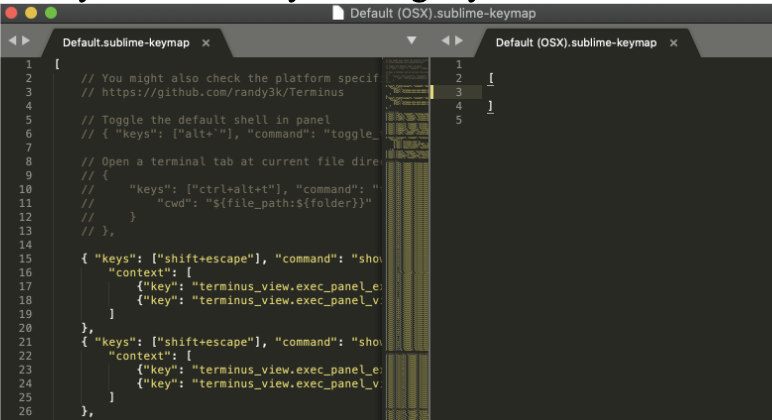
[
{]
"keys": ["alt+`"], "command": "toggle_terminus_panel"}
[
{]
"keys": ["ctrl+alt+t"], "command": "terminus_open", "args": {}
"cwd": "${file_path:${folder}}"}
[
{]
"keys": ["alt+`"], "command": "toggle_terminus_panel", "args": {}
"cwd": "${file_path:${folder}}"}